How to remove the background from a picture
Background removal takes the subject of a photo (a person, a pet, a product) and separates it from everything behind it. This guide covers how to remove a background from a picture for every kind of photo and every device, how to get clean edges on hair and fur, and what to do with the cutout afterwards.
By the EraseMyBG team · Updated October 9, 2026 · 11 min read
Quick answer
To remove the background from a picture, open it in a background remover, let the AI select the subject, refine the edges if needed, then save as PNG for a transparent background or as JPEG with a new one. Built-in options: Finder › Quick Actions › Remove Background on a Mac, Paint › Remove background on Windows 11, and touch and hold the subject in Photos on iPhone. For hair, fur, batches and full-resolution results, use a dedicated app.
- People and pets: use a high-detail mode so hair and fur survive.
- Logos, signatures, scans: use a white-background remover, not subject detection.
- Want transparency? Save as PNG, never JPG.


Drag to compare. Background removed on a Mac with EraseMyBG.
How background removal works
Every background remover does two jobs. First it decides which pixels belong to the subject: older tools used color and edge contrast (the magic wand), modern ones use an AI segmentation model trained to recognise people, animals and objects. Second, it decides how solid each edge pixel is. A strand of hair is thinner than a pixel, so its pixel is part hair, part background; good tools give it partial transparency and remove the background’s color from it, so the cutout doesn’t glow with a halo on its new background.
The result is a mask, and pixels outside it become transparent (an alpha value of 0). If you want to understand transparency itself, the alpha channel and which formats keep it, see how to make an image transparent.
The best way to remove a background, by situation
| Your picture | Best approach | Free option |
|---|---|---|
| Portrait, selfie, headshot | AI subject detection, high-detail edges | Mac Finder / Preview, Windows Paint, iPhone Photos |
| Long or curly hair, fur | High-detail matting + edge color cleanup | Built-in tools work, edges are rougher |
| Product for a store listing | Subject detection + white background + shadow | Built-in tools, then add white yourself |
| Group photo or several objects | Detection with subject picking | iPhone Photos (lifts all subjects) |
| Logo, signature, scan | Color key (white to transparent) | Preview Instant Alpha, GIMP Color to Alpha |
| Dozens or hundreds of pictures | Batch processing | Finder Quick Action (one folder at a time) |
The 3-step workflow that works for any picture
- Select the subject. Open the picture in your background remover and let it detect the subject. In EraseMyBG: drag it onto the window, paste with ⌘ V, or right-click it in Finder and choose Erase Background.
- Refine the edges. Zoom in on hair, fur, fingers and thin straps. Switch to High detail for soft edges, drop subjects you don’t want, and fix mistakes with Erase and Restore brushes. Edge-aware brushes snap to the subject so you don’t have to trace.
- Decide what goes behind it, then export. Keep it transparent (PNG), or add white, a color, a blur or another photo and export a JPEG. Export at full resolution.
Removing the background from pictures of people
Faces and bodies are easy for any modern tool; hair is where background removers differ. Fast modes produce a smooth outline that clips flyaway strands and often leaves chunks of the old background trapped inside curls. High-detail matting keeps individual strands and makes the gaps between them see-through.
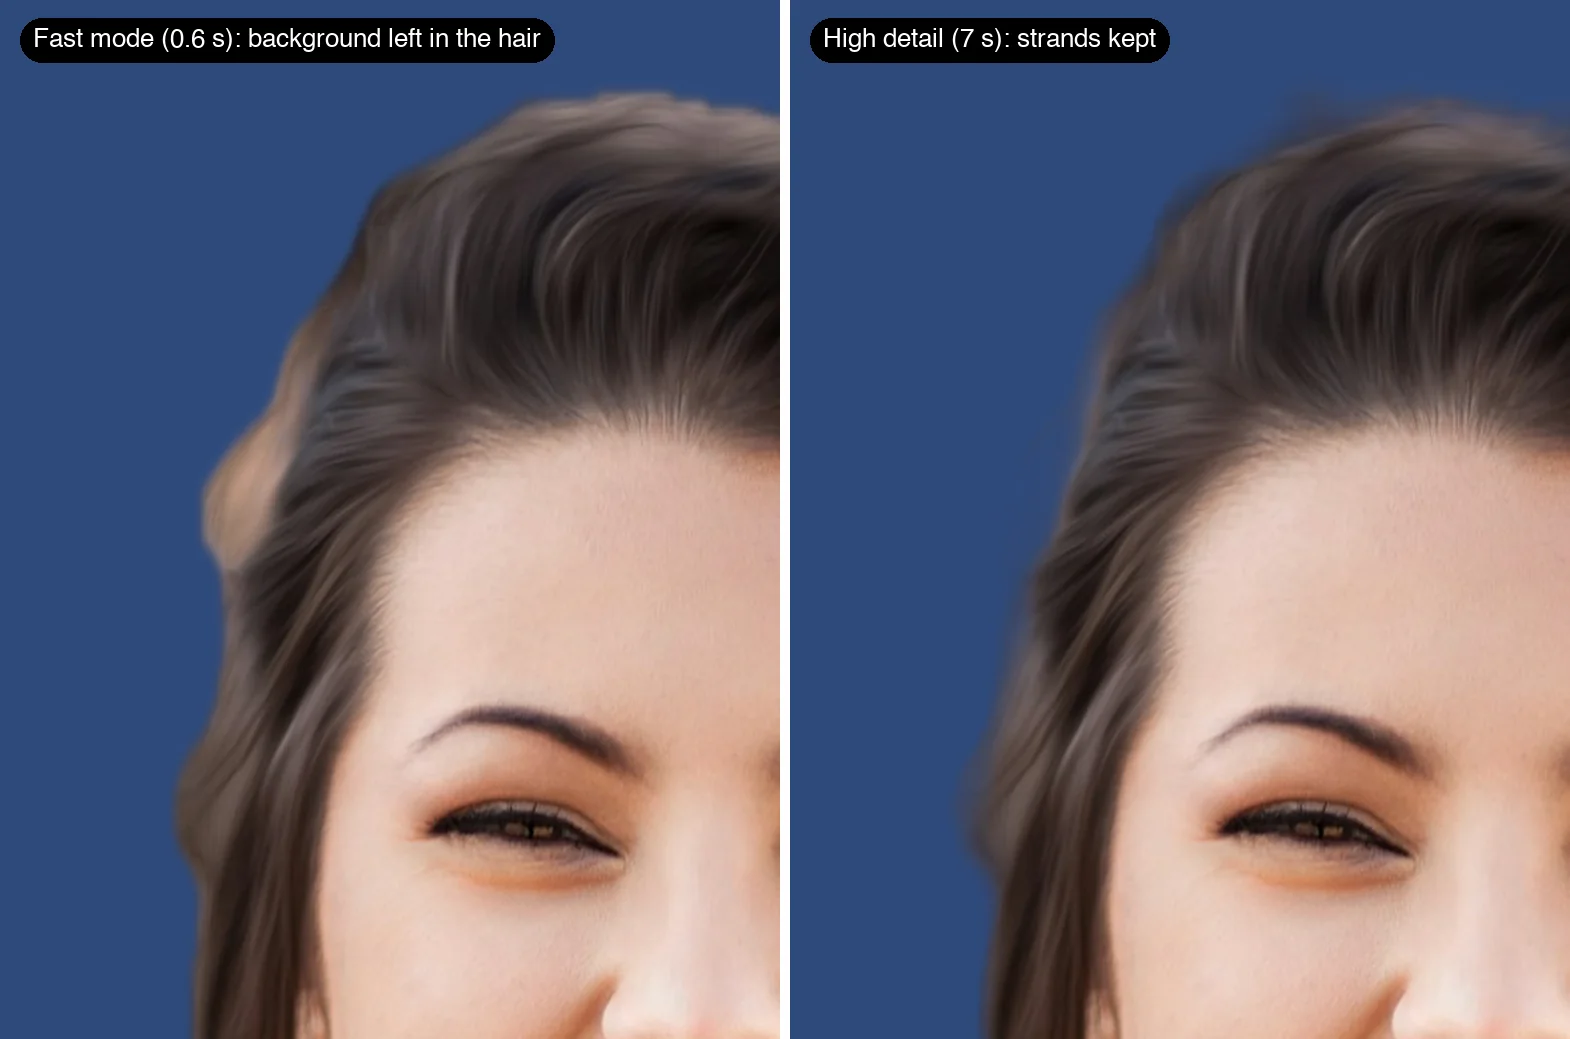
- Use Fast for previews, product shots and quick social posts; use High detail for portraits, headshots and anything with hair.
- Keep Clean edge colors on, so a strand that was in front of a green wall doesn’t stay green.
- For profile pictures and LinkedIn headshots, a soft studio gray or a blurred original background looks more natural than pure white.
Removing the background from pictures of pets
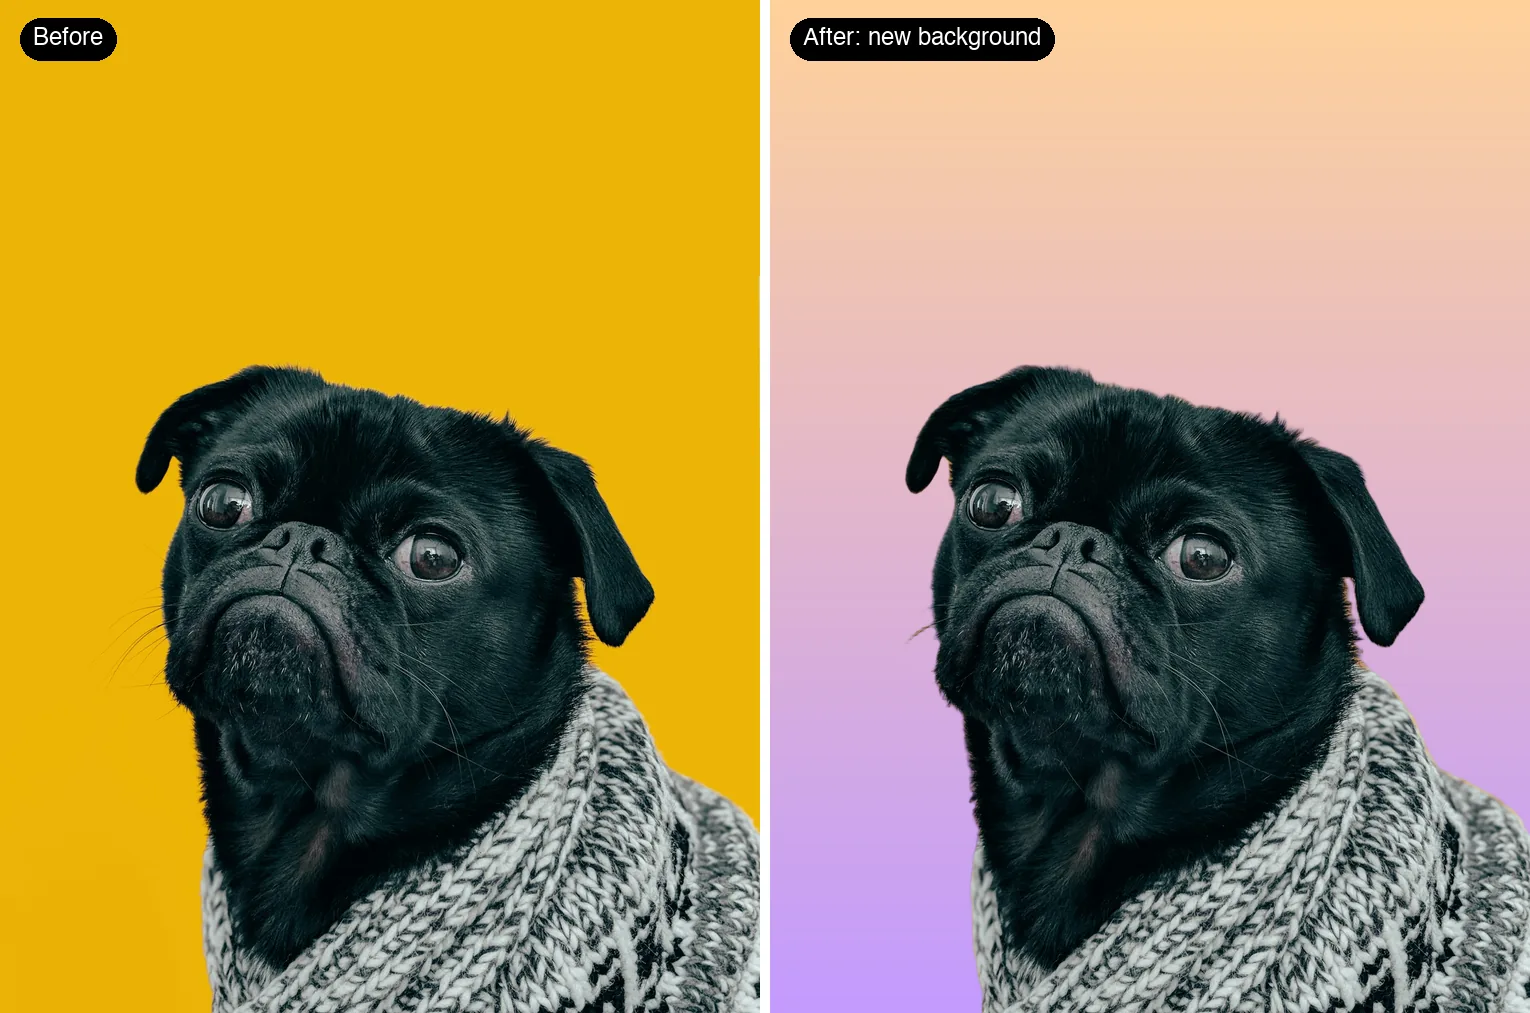
Fur behaves like hair, only more of it, and whiskers are thinner still. Shoot against a background that contrasts with the coat (a black pug against a bright wall is ideal), and use high-detail mode so ear and chest fur stay soft.
Removing the background from product photos
For store listings, marketplaces usually want the product on a plain white background, centered and filling most of the frame. Amazon, for example, requires a pure white background for main images and recommends the product fill about 85% of the frame. Remove the background, place the product on white, and add a soft shadow so it looks placed rather than pasted.

Presets for Shopify (2048 × 2048), Etsy (4:3), eBay and Instagram Stories (9:16) work the same way, and you can apply one preset to a whole folder so every listing matches.
When there are several subjects in the picture
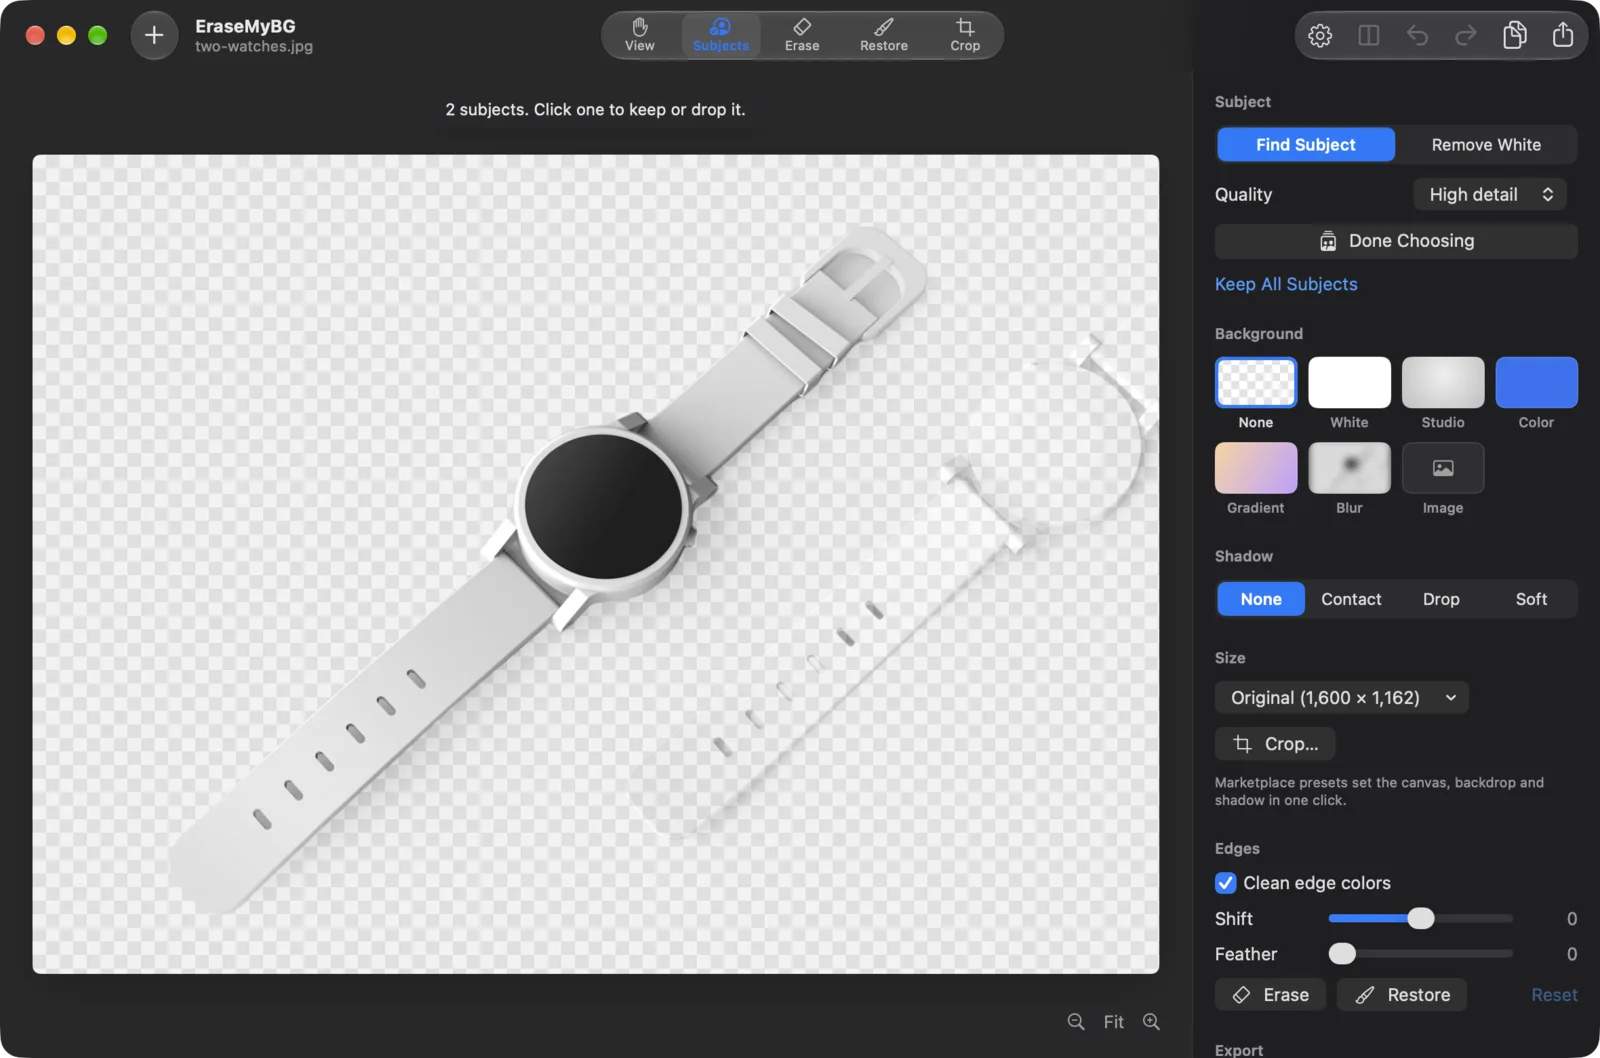
AI removers usually keep every subject they find: two people, a person and a dog, or a row of products. If you only want some of them, you need a way to choose. In EraseMyBG, the Subjects tool shows how many subjects were found; click one to drop it, click again to bring it back.
Logos, signatures and text
Graphics on white paper have no “subject” for an AI model to find, so subject detection cuts letters apart or keeps the whole page. Use a color key that turns the white into transparency instead. Our step-by-step guide to removing a white background covers logos, signatures and scans, including how to avoid the white fringe around edges.
What to put behind your cutout
Once the background is gone, you can leave the area transparent or fill it with something new. The same cutout works with all of these:
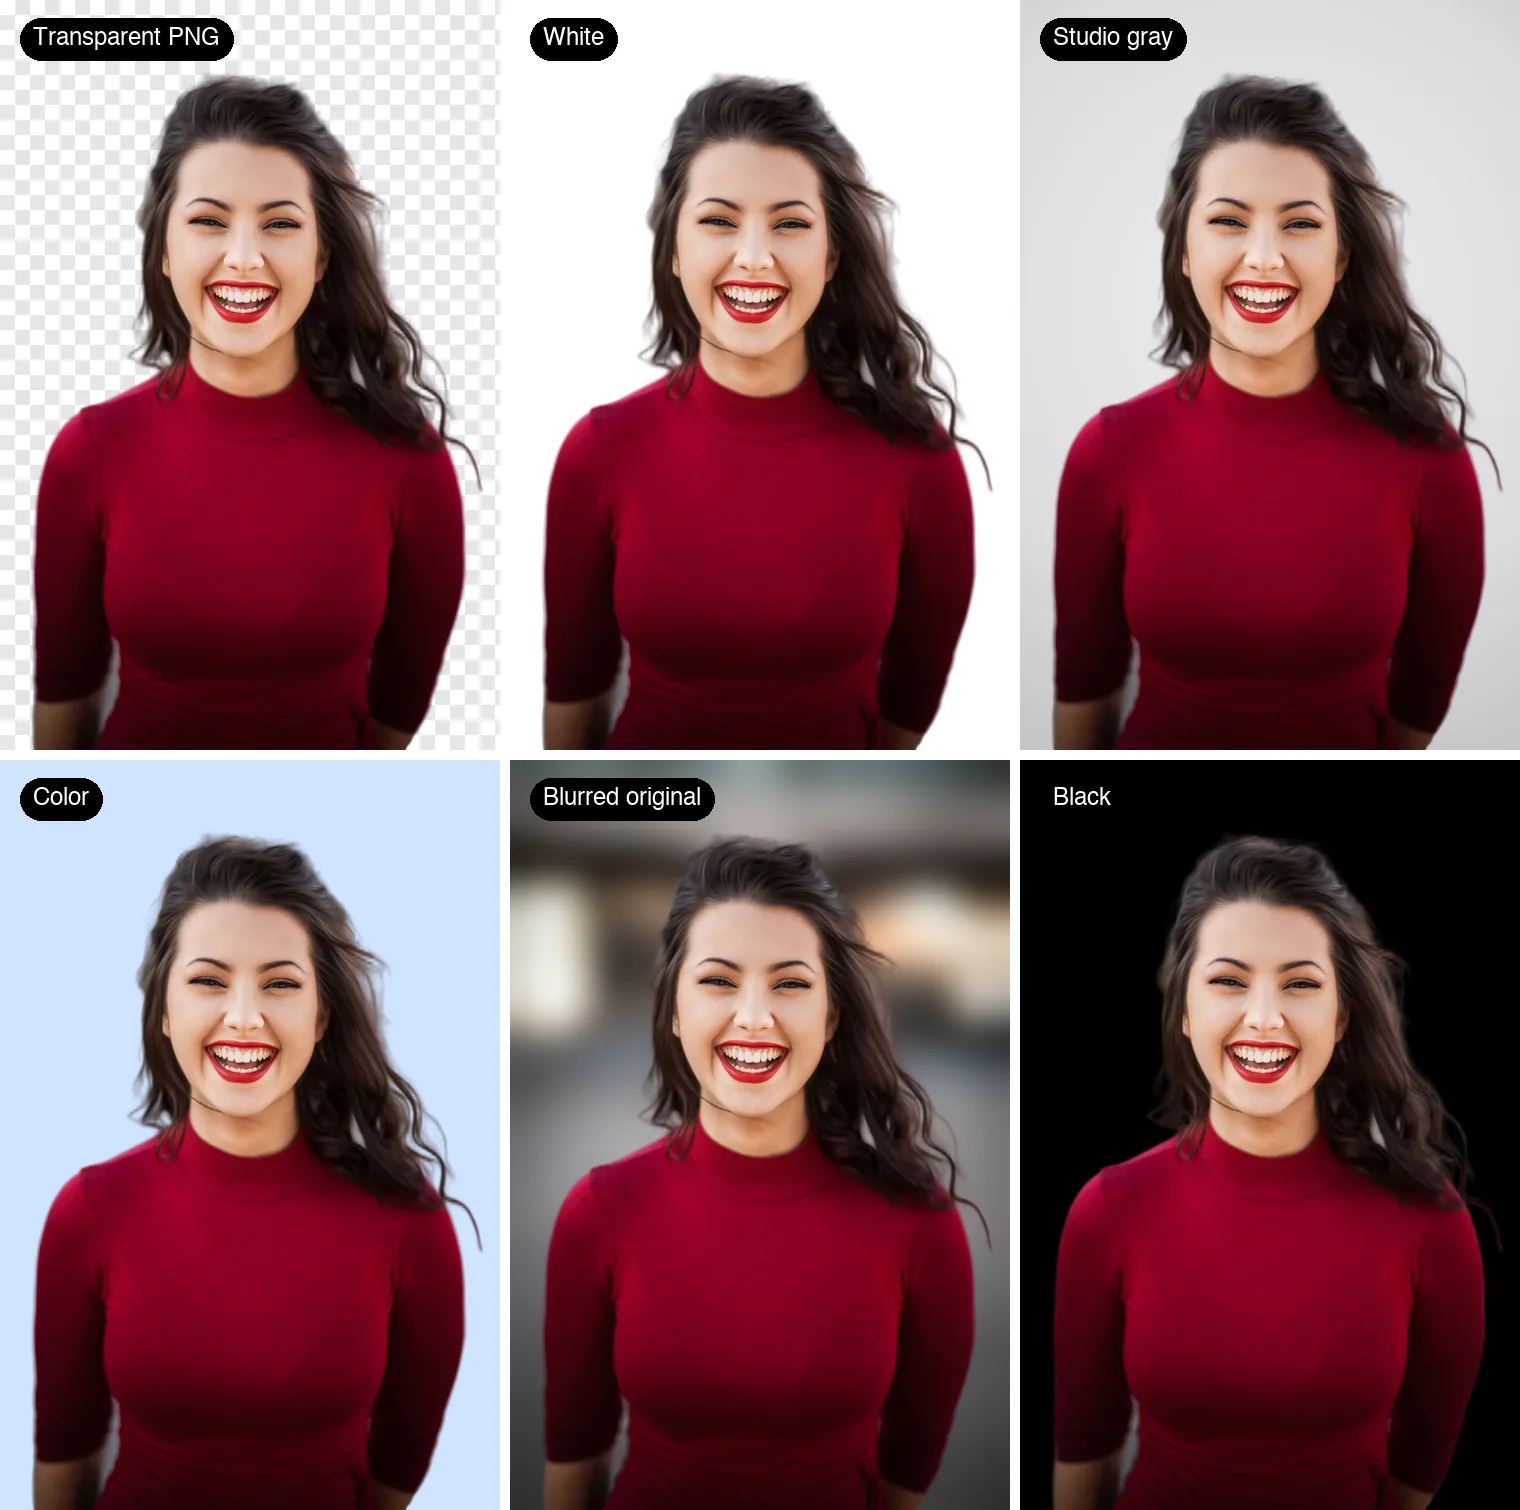
- Transparent: for logos, design tools, slides and stickers. Save as PNG. (More on transparency.)
- White: marketplaces, catalogs, passport-style photos.
- Studio gray: headshots, team pages, LinkedIn.
- Brand color or gradient: social posts, thumbnails, ads.
- Blurred original: keeps the setting but adds a portrait-mode look.
- Your own photo: a new location or a product scene.
How to remove a background on every device
Mac
- Finder: right-click the picture › Quick Actions › Remove Background (macOS Sonoma or later). A PNG appears next to the original.
- Preview: Tools › Remove Background, or ⇧ ⌘ K (macOS Ventura or later).
- EraseMyBG: high-detail edges, brushes, subject picking, new backgrounds, presets, batch folders and Finder integration, all offline. $9.99, one-time.
Windows
- Paint (Windows 11): open the picture, click Remove background in the Image group, then save as PNG.
- Word and PowerPoint: Picture Format › Remove Background, mark areas to keep or remove, then Keep Changes.
iPhone and iPad
Open the picture in Photos (iOS 16 or later), touch and hold the subject, then Copy or Share. Sharing to Files saves a transparent PNG.
Android
On Samsung Galaxy phones with One UI 5.1 or later, open the picture in Gallery and touch and hold the subject to copy, share or save the cutout. Google Photos on Android doesn’t do full background removal, so on other phones use an app or a website.
Online and in design apps
Web tools and design apps like Canva remove backgrounds in a browser; Canva’s remover needs a Pro plan. They’re convenient on any device, but the picture is uploaded to their servers and free downloads are often reduced in size. Photoshop’s Remove Background quick action and GIMP’s selection tools give full manual control. Step-by-step instructions for each are in our transparency guide.
Picture background remover tools compared
| Tool | Edges on hair and fur | New backgrounds | Batch | Privacy | Price |
|---|---|---|---|---|---|
| macOS / Windows / iPhone built-in | Good on clear subjects | No | Finder: per folder | On device | Free |
| EraseMyBG (Mac) | High detail + edge color cleanup | White, color, gradient, blur, image, presets | Folders, watch folders | On device, offline | $9.99 once |
| Online removers | Varies; often good | Some | Usually paid credits | Uploaded | Free tier, then credits |
| Photoshop | Excellent with manual work | Yes, manually | With actions | On device (cloud features vary) | Subscription |
| GIMP | Manual | Yes, manually | Scripting | On device | Free |
Tips for a cleaner cutout
- Contrast wins. A subject that stands out from its background (dark on light, colored on plain) gives every tool cleaner edges.
- Start big. Use the original, full-size picture. Edges can’t be recovered from a small, compressed copy.
- Avoid motion blur and heavy backlight. Blurred edges and bright halos behind hair are the hardest cases for any remover.
- Check on dark and light. Before exporting, view the cutout on both; halos show on dark, missing hair shows on light.
- Keep the shadow on purpose. Removers drop shadows with the background. Add a soft contact shadow back for products so they don’t look like they’re floating.
- Save the right format. PNG for transparency, JPEG only when the new background is opaque. If transparency turns white after saving, see why that happens.
Frequently asked questions
How do I remove the background from a picture for free?
Use the tool already on your device. On a Mac (macOS Sonoma or later), right-click the picture in Finder and choose Quick Actions › Remove Background. On Windows 11, open it in Paint and click Remove background. On iPhone or iPad (iOS 16 or later), touch and hold the subject in Photos, then Copy or Share. On recent Samsung Galaxy phones, touch and hold the subject in Gallery.
How do I remove the background from a picture on iPhone?
Open the picture in Photos, touch and hold the person or object until a glowing outline appears, then choose Copy or Share. Sharing to the Files app saves a PNG with a transparent background. It needs iOS 16 or later.
How do I remove the background from a picture on Android?
On Samsung Galaxy phones running One UI 5.1 or later, open the picture in Gallery, touch and hold the subject, then copy, share or save the cutout. Google Photos on Android doesn't offer full background removal, so on other phones use a background remover app or website.
Can I remove a background without losing quality?
Yes, as long as the tool exports at the original resolution and you save as PNG. Many free online removers shrink the free download; EraseMyBG and the built-in Mac, Windows and iPhone tools keep the full size.
What is the best picture background remover?
It depends on the picture. Built-in tools are fine for a clear subject. For hair, fur and fine edges, use a high-detail AI matting tool that also cleans edge colors. For logos and signatures, use a white-background (color-key) remover. For many pictures at once, use something with batch processing.
How do I remove the background from a picture and add a new one?
Remove the background first, then place the cutout on a new layer: a solid color, a gradient, a blurred version of the original, or another photo. In EraseMyBG you pick the new background in the same window and export a finished JPEG or PNG.
How do I remove the background from a picture in Word or PowerPoint?
Select the picture and choose Picture Format › Remove Background. Mark areas to keep or remove, then click Keep Changes. To use the cutout elsewhere, right-click it and choose Save as Picture › PNG.
Can I remove the background from a PNG?
Yes. A PNG can already contain transparency, so removing the background just turns the rest of the image transparent too. Save the result as PNG again to keep it.
EraseMyBG for Mac
Remove any background on your Mac, with hair-level edges.
High detail for people and pets, Remove White for logos, presets for every marketplace, batch folders, Finder and Shortcuts. Offline and private. One-time purchase, 3 Macs.
Related guides
How to make an image transparent ›
Every way to remove a background and save a transparent PNG, on Mac, Windows, iPhone, Office and Photoshop.
How to remove a white background ›
Logos, signatures, scans and product photos: clean transparent PNGs with no white fringe.
Install and activate EraseMyBG ›
Download, the one-time “Open Anyway” step, and activating your key.